Portfolio
- I am a skilled videogame and interactive experiences programmer.
- Specialized in game logic and interaction programming.
- Proficient with many tools, always willing to learn some new.
- I have a passion for videogame design.
These are the most important projects that I’ve worked on, sorted newest to oldest:
Dustgrave
Project link
Dustgrave is a sandbox RPG with complex systems and emergent gameplay, currently in development at InnerVoid. Here I am lead programmer.
Chef: A Restaurant Tycoon
Project link
Chef: A Restaurant Tycoon allows you to personally don a kitchen apron and embark on an exciting career in the wild world of professional cooking. Starting with nothing but pocket change, a small restaurant, and an ambitious dream, you’ll ascend from the life of a humble cook to that of a world-famous chef. I've been the main programmer on this project.
enCircled
Project link
A simple, colorful, mind easing arcade with almost self explaining gameplay. A one-man side-project realized as an experiment in one man developement and minimal gameplay.
Edge Guardian
Project link
A surreal-futuristic action beat-em-up for the HTC Vive. I've worked on this from the beginning until February 2017. Did all coding and some design.
Mousegician

One-touch based, story driven puzzle-platformer. Here I did full code and some design. This project was unfortunately cancelled.
Ritual Cool
Project link
Bang on that bongos like there's no tomorrow, summon your totems and fight! Hypothermic and Lonely Crew entry for Global Game Jam 2016. Here I did part of the coding and some highly caffeinated and sleep deprived design. The name, when pronounced with an italian accent, is a very bad italian pun.
Artusi Cooking Time

Cooking flavored match three game, based on the works of Pellegrino Artusi. Developed by SpinVector S.p.a. for Treccani. Here I did UI coding. The game is unfortunately not available anymore.
I Move Together
Project link
This is my entry for Global Game Jam 2015. The game is all by me, except for the main screen, music and sfx. I have very fond memories of this game and how I was able to put it together after a disastrous first day at the jam.
Bang! The Official Videogame
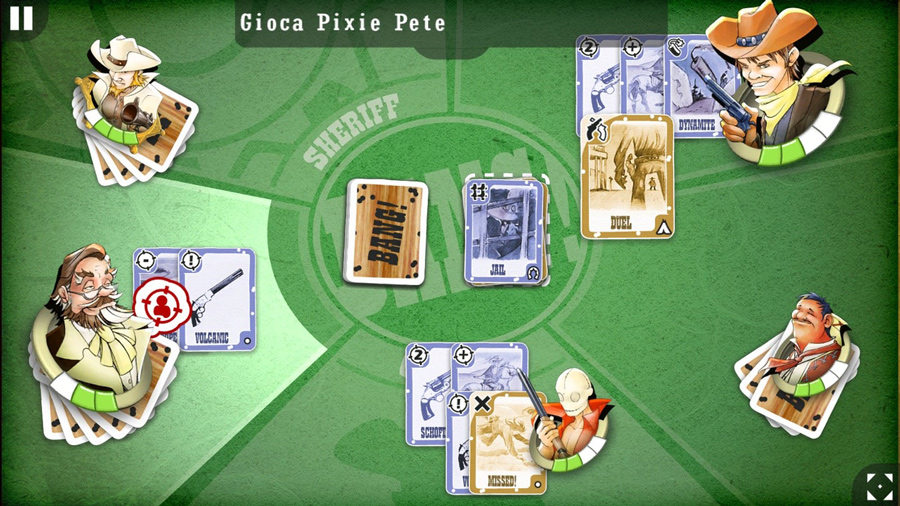
Official adaptation of the famous card game. Here I did UI coding and some PS3 port coding. This game is unfortunately not available anymore.
Lifesize Games
Project link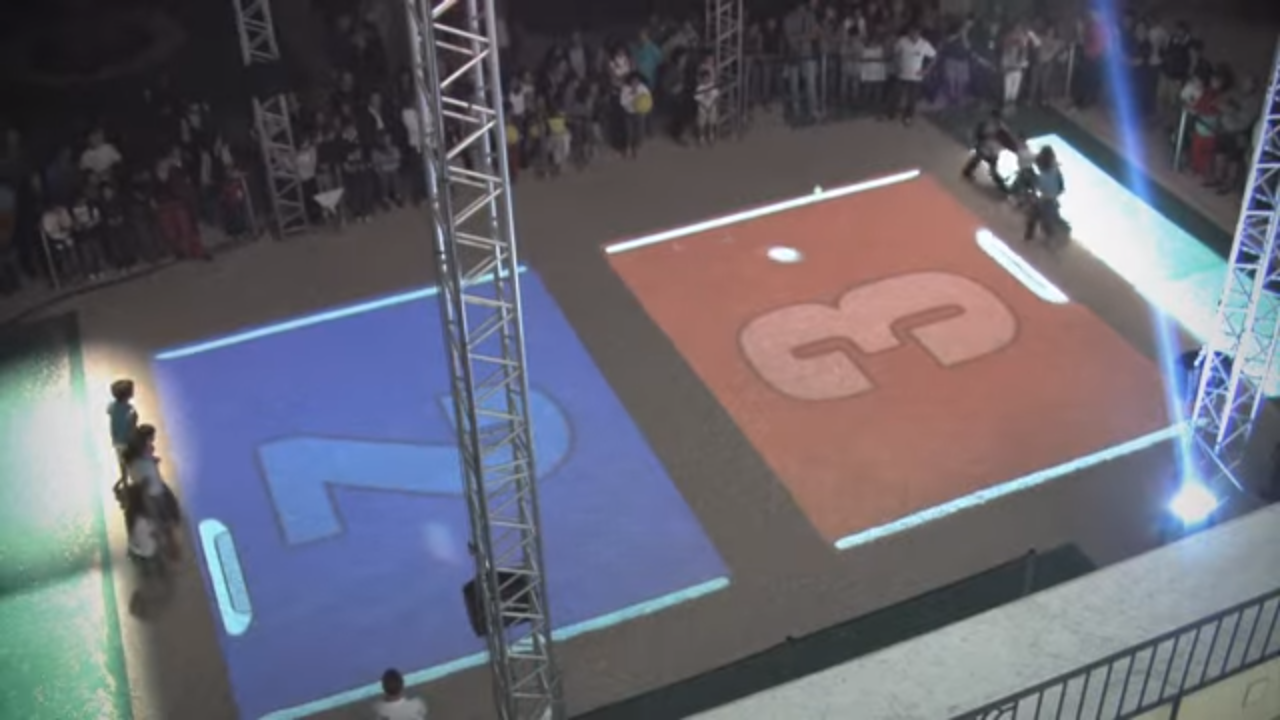
Lifesize, floor projected, full body controlled games, built at SpinVector S.p.a. This was an incredibly rewarding project to make and I did all the coding, except for the computer vision algorithm. Also, the first version of this was running on a (long lost) 2D engine entirely made by me.
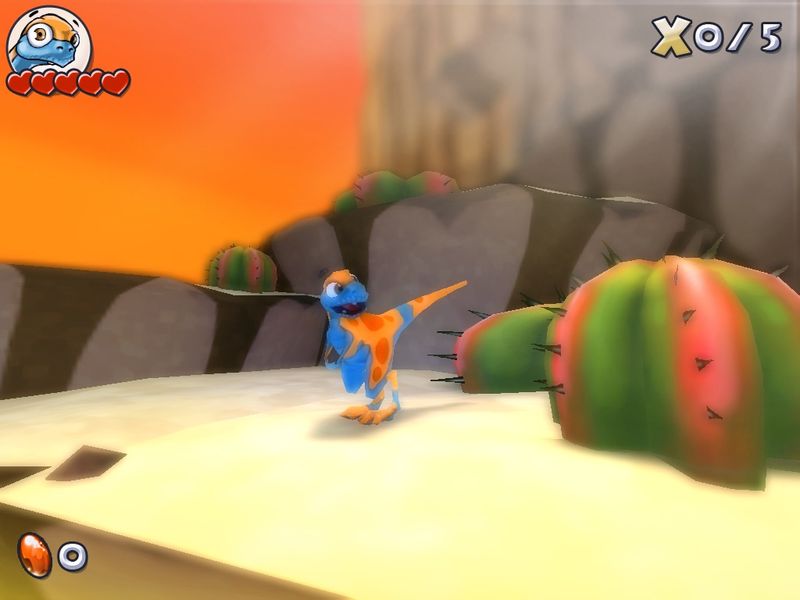
Ciro: The Puppy Dino
A 3D action platformer for the whole family developed by SpinVector S.p.a. and featuring a cartoon version of a famous puppy dinosaur fossil. Developed with Torque 3D (did most of the coding, apart from some graphic effects and porting), this was my first commercial shipped product. It's not available anymore, unfortunately, but I jealously preserve a german CD copy still wrapped in its plastic.